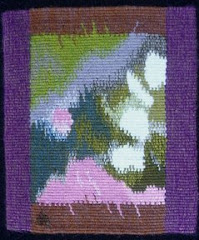
Donna asked if it looks the same on both sides. I said I thought it did, and then she asked if I could post photos of the front and back of my samples.
Well, I am not at home, so my first reaction was that I could not do this. I hate to admit defeat, though, so I thought “I can just weave a small sample and photograph it.”
Although I have 3 portable looms here with me, they all have projects on them so I can’t just weave a sample and cut it off to see both sides.
I looked around for something I could put a warp on, and spotted a nice little chair.
Bran Flakes? You might be wondering how they function in tapestry weaving.

I use a piece of the box to put between the 2 layers of warp so I don’t go crazy looking at both layers at once. I also use small strips of the box as a header at the beginning.
It’s only 12 warps wide and it took about 45 minutes to warp it up, weave the sample, cut it off and photograph it.
Unfortunately I forgot I would be looking at the back, so I had some short weft ends hanging out 
My conclusion after performing this scientific experiment?
The weft interlock looks the same on the front and the back; but don’t take my word for it, try a sample yourself!
It’s not that hard after all!


4 comments:
WOW! very clever and nifty!
Happy weaving, Vera
It was a lot of fun! It's been a long time (30 years?) since I wove on furniture, and I realized I've acquired a lot more knowledge and skill in all that time, so it was much much easier.
You should weave up that whole slit in the chair! That would be kind of cool!
What a great idea, Kathy! I think it would be fun to reclaim old furniture and incorporate it permanently into tapestries!
Post a Comment